

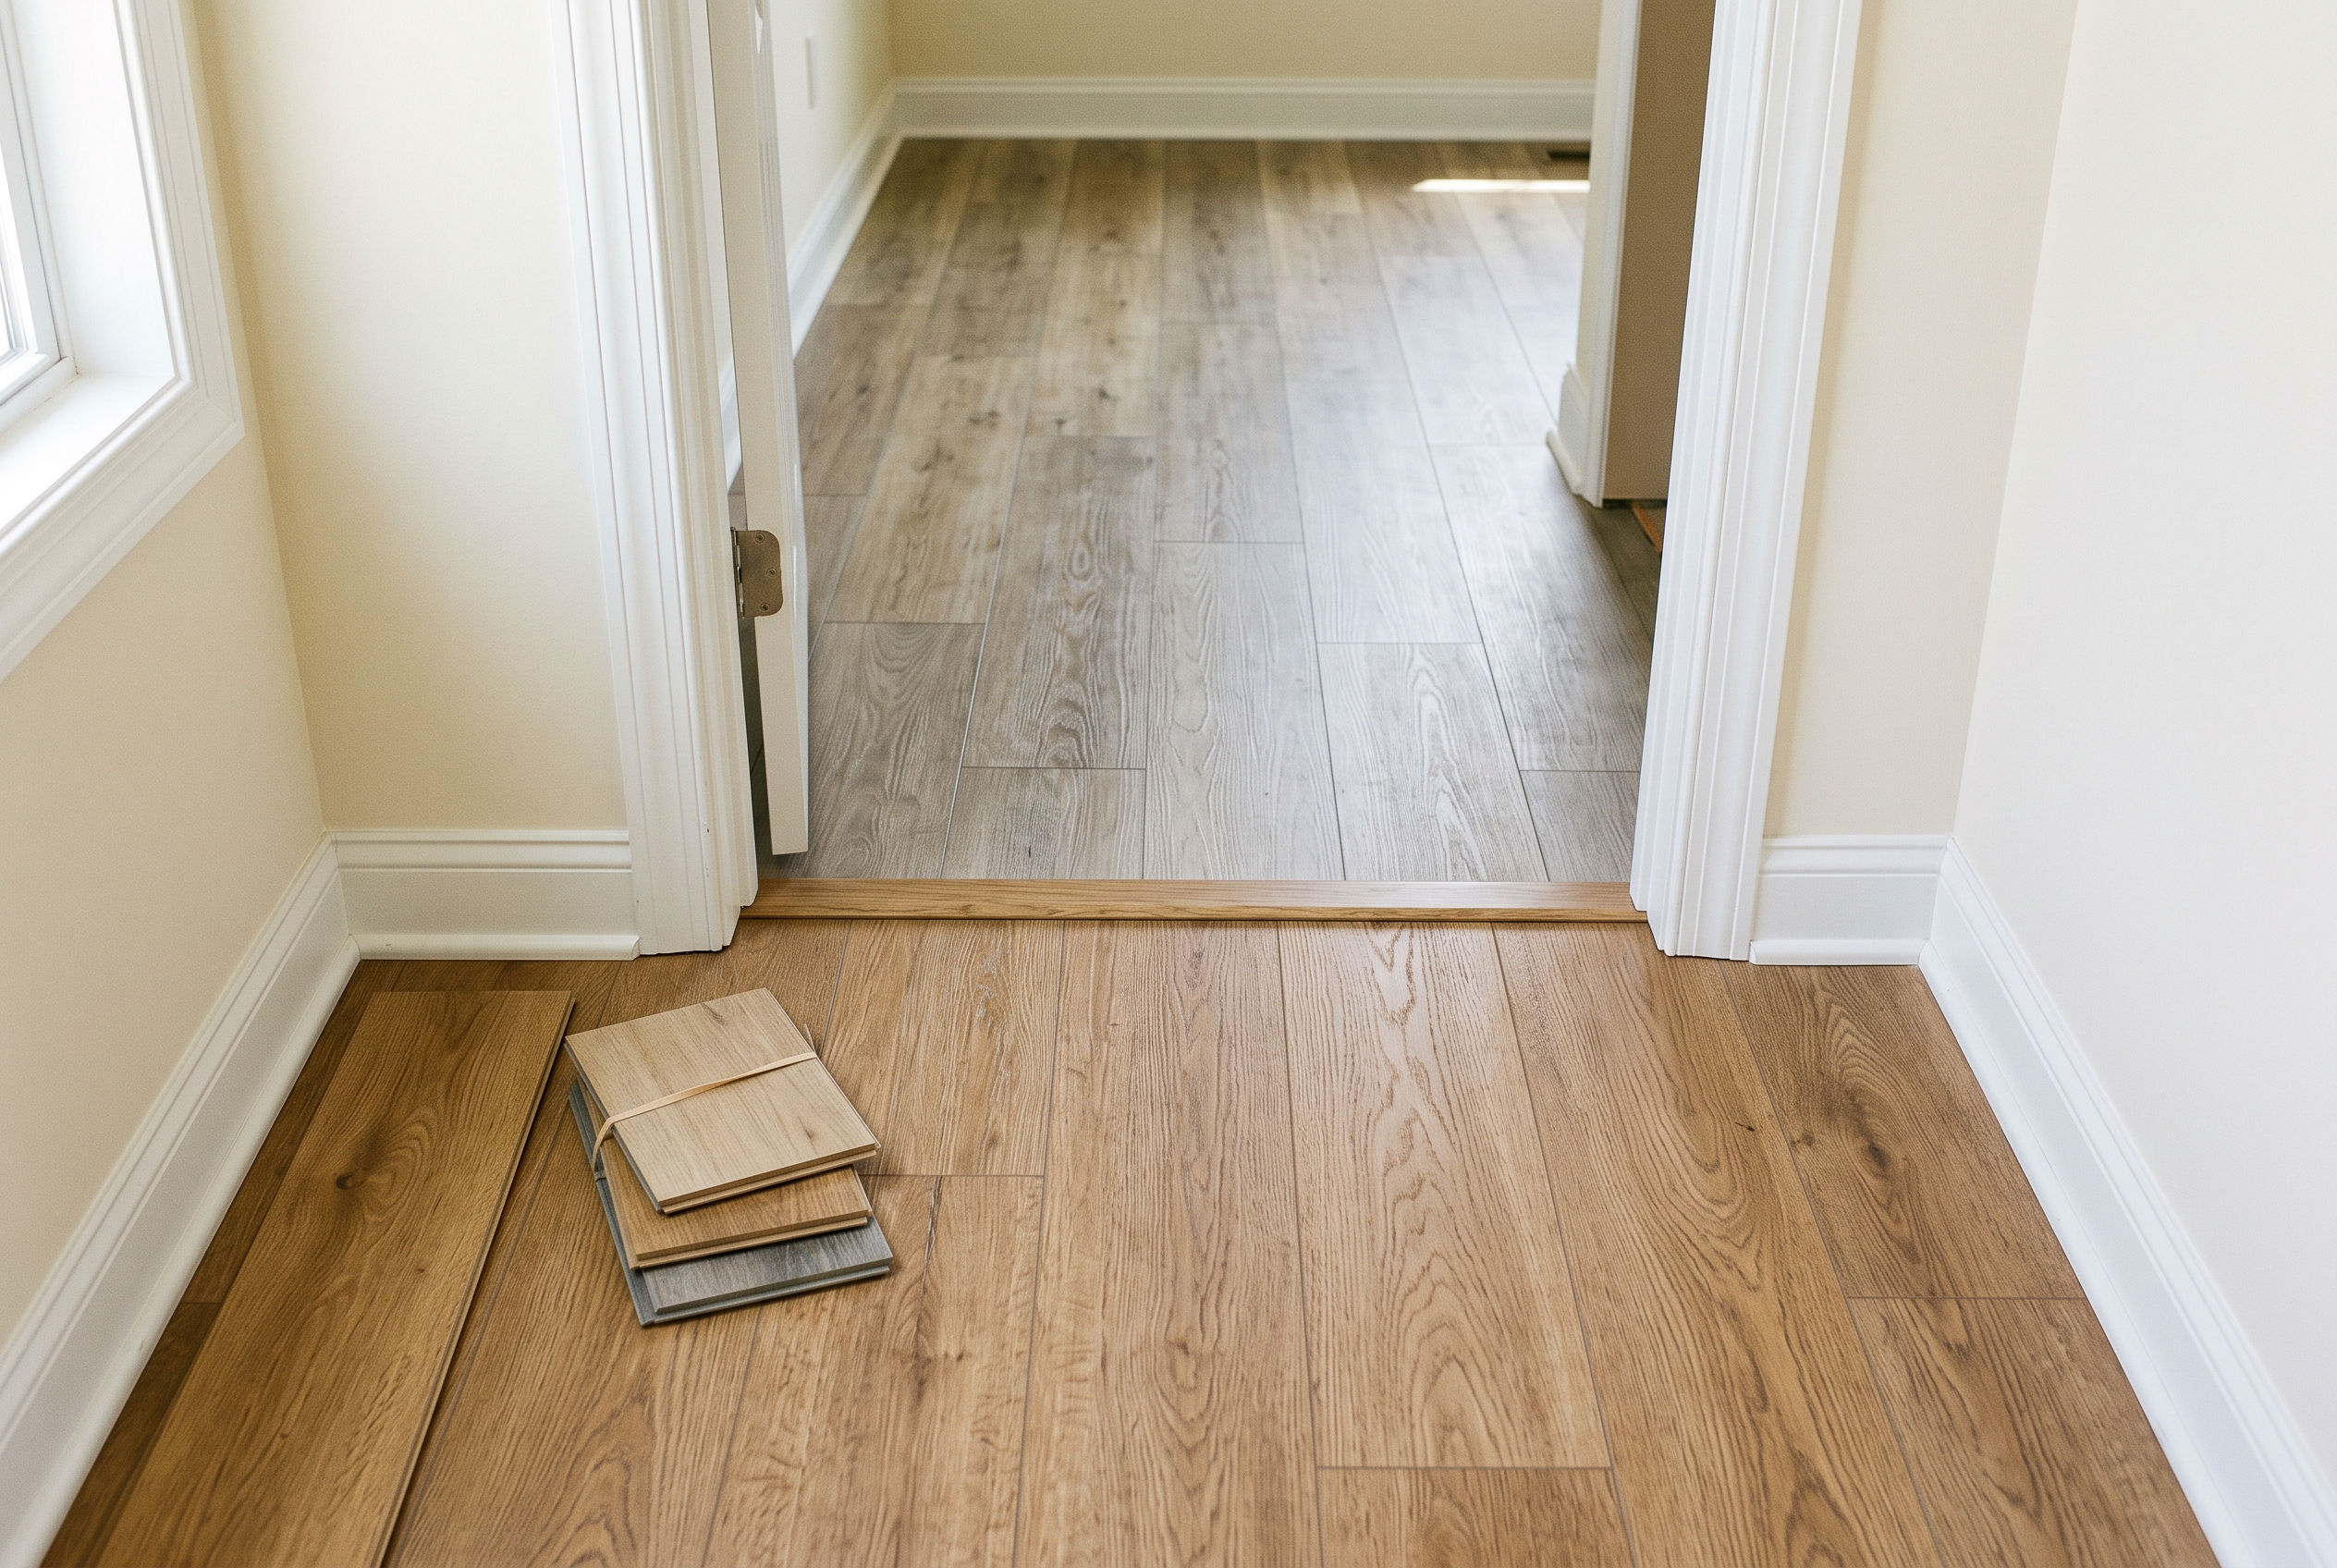
Matching existing luxury vinyl plank comes down to four steps. First, identify what is on your floor. Second, check the details that have to agree, which go well beyond color. Third, compare samples on your own floor, in your own light. Last, choose an exact match, a close match with a planned break, or new flooring for the whole connected area. Which steps matter most depends on whether you are replacing boards or adding a room, and on whether you still have the box.
Replacing a few damaged boards: use your spare planks first. With no spares, borrow planks from a closet and put the closest match you can find in the closet instead. How the floor was installed decides how the boards come out.
Adding a room through a doorway: a planned break at the door, covered by a transition strip, frees you from needing an exact match. The new room can take a close match or a clear contrast.
Adding into an open area: with no doorway to break at, the new floor has to be the same product joined into the old one, or the connected area gets new flooring together.
No box and no spares: you can still identify the floor from the planks themselves, but the odds of an exact match drop as the floor gets older.
| Situation | Best route | What has to agree |
|---|---|---|
| A few damaged boards | Spares, or swap from a closet | Everything: the same product |
| New room through a doorway | Close match or contrast, plus a transition | Height at the doorway |
| New area in an open plan | Same product joined in, or re-floor | Core, lock, thickness, color |
| Older floor, no box | Identify it, then decide | Core, lock, size, look |
Start With the Box, the Receipt or the Builder's Records
The fastest way to match luxury vinyl plank is to learn the exact product, and the box, the receipt or the builder's records usually name it. Look in these places first:
- Leftover cartons in the garage, attic, basement storage or under the stairs. The label names the maker, the collection and the color, and usually carries a production code. Photograph the whole label.
- The receipt, order confirmation or installer's invoice, which often lists the product by name and number.
- For a newer home, the builder's selection sheet from the design center, which lists every finish chosen for the house.
- For a condo or rental, the association's or property manager's records, since many use one floor across units.
- Any spare planks, which are the best repair stock you will ever have.
Write down four things: the maker, the collection, the color name and the production code. With those in hand, the next question is whether the product is still made, since makers retire and refresh colors over time.
How to Identify Vinyl Plank When There Is No Box
Without a box, a vinyl plank may not tell you its brand, but it will tell you everything a match depends on: the core, the lock, the size and the look. Work through these steps before you shop:
- Find an edge you can see without damage. A floor vent register lifts out. A transition strip at a doorway or the quarter round in a closet can come off. On a floating floor, the last row along a closet wall can often be unclicked.
- Measure the total thickness with a ruler or calipers, then the width and length of a full plank.
- Try a bend test on a loose plank or an offcut. A rigid core plank barely flexes, and a flexible plank bends easily. Rigid planks are usually floated; flexible planks are usually glued.
- Photograph the edge up close, so the tongue and groove shape shows. Note whether a foam or cork pad is attached underneath.
- Check the back for markings, such as a code, a date or a direction arrow.
- Look across the surface at a low angle, toward a window. Note whether the texture follows the printed grain, whether the edges are beveled, and how shiny the finish is.
- Count how many different plank images you see before one repeats.
Bring a loose plank, or those photos and measurements, when you shop. A plank in hand settles questions a photo cannot.
The Details That Have to Agree, Not Just the Color
Locking systems differ from brand to brand, so the core, the lock and the thickness have to agree before color even matters. A plank can be the right color and still refuse to join, sit at the wrong height, or catch the light differently. These are the details to check when a new plank will sit next to or join an old one:
| Detail | Why it matters | How to check |
|---|---|---|
| Core type | Rigid and flexible planks do not join | Bend test |
| Locking profile | Different profiles will not click together | Close photo of the edge |
| Thickness and pad | Heights must meet at the join | Measure; look underneath |
| Width and length | Size differences show at a glance | Measure a full plank |
| Bevel, texture, sheen | They catch light differently | Look at a low angle |
| Wear layer | Sets how the new board ages | Spec sheet |
| Color and production run | Shades shift between runs | Carton label |
Check the locking system first, since it is the detail near-matches most often miss. Makers use different profiles, and some planks only lock by angling in along both edges, so a plank from another collection will not engage even at the same thickness.
The wear layer, the clear top layer, is the other hidden difference. A new board with a thinner or thicker one will age at a different pace beside the old ones, and our guide to vinyl plank thickness and wear layers shows where to find that number.
The Honest Odds of Finding an Exact Match
The odds of an exact match are good when the floor is a few years old and its collection is still made. They are poor when the floor is older, because colors are retired and refreshed, and a plank you could have bought three years ago may be gone today.
Even the same product is not always identical. Makers ask installers to mix planks from several cartons because shades vary from box to box. Mannington, one of the brands we carry, makes one of its planks in two plants, prints the country of origin on the carton, and asks installers not to mix the two. The production details on the label matter as much as the color name.
Your floor has also changed since it went down. Sun fades it, traffic dulls the finish, and grime settles into the texture. The sun is stronger at our elevation than at sea level, so floors near south and west windows change fastest here. A brand-new plank of the same product can look lighter or brighter beside boards that have lived with that sun for years.
So when the product is still made, get a full carton before you commit, lay several planks on the floor, and look at them in daylight. That tells you more than any sample.
Replacing Damaged Boards
How the floor was installed decides how a damaged board comes out. With no spares, take planks from a closet or from under furniture that never moves, use them for the repair, and put the closest match you can find where it will not be seen. Our post on floating and glue-down vinyl plank explains how each method holds a plank in place.
Let replacement planks sit in the room for about two days first, or as long as the instructions for your floor say. That brings them to the same temperature as the floor around them.
Floating Click Floors
On a floating click floor, a damaged plank near a wall is the easy case. Take off the baseboard or quarter round, unclick the rows back to the damaged plank, swap it, and click the rows back in. The maker's repair instructions give this as the first method.
A plank in the middle of the room takes a different method:
- Cut out the center of the damaged plank with a circular or multi-tool saw, leaving about an inch attached along the edges.
- Cut in from the corners and work the edge strips out of the surrounding tongues and grooves.
- Trim the locking profile off the replacement plank so it can drop into the opening.
- Test the fit, then seal the exposed edges with the seam sealer the maker names and hinge the plank into place.
- Roll it flat and weight it until the sealer holds.
The risk is chipping the locking edges of the planks around it. On a floor you care about, that makes the cut-out method a job for an installer.
Glue-Down and Loose-Lay Floors
A glue-down plank comes up with heat. Warm it with a heat gun or hot air blower until the adhesive softens, then lift it at the seam with a thin putty knife. Scrape off any lumps of old adhesive before the new plank goes in.
Spread a thin coat of the adhesive the maker names on the back of the new plank, set it and roll it. Go easy on the adhesive, because too much leaves the new plank sitting higher than its neighbors. Weight it until the adhesive sets. Loose-lay planks are the simplest of all: they lift straight out, and a new one drops in.
Boards Damaged by a Leak
After a leak, stop the water and dry the subfloor before any plank goes back. A vinyl plank shrugs off water, so the planks may look fine while the plywood or slab underneath stays wet. Lift enough planks to see how far the water spread, and check for a musty smell or dark staining.
Dry the open area with fans and a dehumidifier, and give it more time than feels necessary. A surface that is dry to the touch can still be wet underneath, so a moisture reading is the safer test. If an insurance claim covers the leak, ask the adjuster how the policy treats a floor that can no longer be matched before anything is ordered. Our explainer on what a waterproof rating on vinyl plank covers explains why the floor is not automatically waterproof even when the planks are.
Adding Luxury Vinyl Plank to a New Room
If the new room connects through a doorway, you have freedom. A planned break at the door, covered by a T-molding, lets the new floor be a close match or a clear contrast. If the new area opens straight onto the old floor, the new planks have to be the same product joined into the old ones, or the connected area needs new flooring together.
A basement or second-story add-on is the easiest case of all. The stairs make a natural break, so the new floor only has to look good with the old one, not join it.
Joining new planks into an old floating floor asks a lot. The locking profile, thickness and pad have to match, and the two floors become one floating floor that expands and contracts as a single piece.
Makers also limit how far a floating floor can run before it needs a break, around 50 feet in one direction for some rigid planks. An add-on can push the combined floor past that limit, which is a second reason to break at a doorway. Where the floor does continue, keep the planks running in the same direction as the old room.
A few planned breaks that look intentional:
- A T-molding in the doorway, in a color that suits the door casing.
- A change in plank direction where a hallway meets a room.
- A tile or contrasting floor in the new room, so it reads as its own space.
Our guide to flooring transitions covers each profile and where it goes. Kitchen remodels raise the same question in a smaller space. Floating floors do not go under cabinets or islands, so moving a cabinet or an island leaves a bare patch of subfloor to fill with matching planks. Stairs are the other catch, since stair nosing is usually made to match a specific collection.
Your Best Options When There Is No Match
When your vinyl plank is discontinued or no exact match exists, three things decide the best option: how visible the join will be, how much life is left in the old floor, and your budget. Each option here is the right answer for someone.
| Option | Best when | Watch for |
|---|---|---|
| Swap from a closet | A few boards in a busy spot | The closet gets the near-match |
| Planned break at a doorway | Rooms joined by a door | Clearly different beats almost-same |
| Deliberate contrast | The new room can stand apart | Keep the undertones related |
| Threshold feature | An open plan with a natural line | A flush transition |
| Re-floor the connected area | Open plans, worn floors, selling soon | Highest cost, cleanest result |
The closet swap is the quiet fix for a repair. It keeps original planks in the spots everyone sees and hides the near-match where nobody looks.
A planned break works for add-on rooms, and the one mistake to avoid is the almost-match. A floor one shade off reads as an error, while a floor that is clearly lighter or darker, with a related undertone, reads as a choice. Our guide to coordinating vinyl plank with existing floors walks through undertone and contrast.
A threshold feature can make a break in an open plan look designed. Think of a tile band, or a change in plank direction along a natural line such as a kitchen island or a half wall.
Re-flooring the connected area makes sense in an open plan with no natural break, when the old floor is worn or faded, or when you are selling soon and a patchwork would show. You can browse our luxury vinyl catalog to see what is available today. Our complimentary design service can help you choose a floor that works with the rooms you are keeping.
Comparing Samples Against Your Floor
Compare samples on your floor, in your light, because the same plank looks different under showroom lights. Follow these steps:
- Clean the existing floor first, so you compare the color and not the dirt.
- Lay each sample right on the floor, next to where the new planks will go.
- Look in the morning, and again in the evening with the lights on.
- Stand and look, then look at a low angle toward the windows, where sheen and texture show.
- Compare against several old planks, since each color prints several different plank images.
- Check a sunny spot and a shaded closet to see how much your floor has faded.
- Ask for a full plank or a carton when you get close, since a small sample hides the plank pattern.
You can bring a plank to our showrooms in Windsor and Cheyenne, or have our shop-at-home mobile showroom bring samples to your floor. If you are picking a color for a new room to suit your furniture instead of your floor, our guide to vinyl plank colors and furniture covers undertones and contrast.
When the New Board Stands Out
A replacement board that stands out usually does so because the old floor has changed around it. The likely causes, in order:
- The old floor has faded or dulled, especially in sun.
- The new board came from a different production run.
- The new board is shinier, because its finish has not seen traffic yet.
- The new board repeats the image of the plank right next to it.
Move the new board to a spot that gets less light and less traffic, and move an original plank into the visible spot. If several boards are new, spread them across a wider area so no single patch reads as new.
Deep-clean the old floor, which often closes the gap, and swap any board that repeats its neighbor's image. If none of that works and the board sits in an open area, a planned transition may be the cleaner answer.
Keep Spares So the Next Repair Is Easy
Keep at least one unopened carton from the same production run whenever a vinyl plank floor goes in. Makers treat spare planks as the key to any repair and suggest planning them into the original order.
Store the carton flat, in its packaging, inside the heated and cooled part of the house. A garage that bakes in summer and freezes in winter is the wrong place. Tape the receipt to the carton and write the rooms it came from on the box.
If you own rentals, one floor across all your units makes every leftover carton useful everywhere. When a unit needs a repair, the spares match because they came from the same run.
Finding a Match or a Coordinating Floor With Us
Wherever you shop for a match, look for a store with a large vinyl plank selection and samples you can take home. Just as important are installers who can read a locking profile and tell you whether two planks will join. That combination turns a matching problem into a plan.
At Masters Petersens Flooring & Interior Design, we carry luxury vinyl plank in a wide range of colors, with showrooms in Windsor and Cheyenne, and our shop-at-home mobile showroom brings samples to your floor. Our complimentary design service can help you choose between a close match, a deliberate contrast and a new floor for the connected rooms. When the new floor is ready, our vinyl installation covers on-site measurement, removal of the old flooring and the installation itself, done by in-house installers trained to manufacturer specifications.
Other Questions About Matching Vinyl Plank
Can You Put New LVP Over Old LVP?
No, not over an old floating floor or a cushioned vinyl. A new floating plank can go over a flat, fully glued, single layer of old vinyl where its maker allows it, but never over another floating floor or over carpet.
Is It Cheaper to Replace a Few Boards or the Whole Floor?
Replacing a few boards costs less when you have spares or can swap from a closet. Re-flooring wins when the join would sit in an open area, when the old floor is worn or faded, or when several rooms need work anyway. A new floor for the connected rooms is priced at our free estimate.
Can LVP Match Laminate or Hardwood?
No, luxury vinyl plank cannot match laminate or hardwood exactly, because the surfaces are made and age differently. It can coordinate with them through a related undertone and a planned transition between the two.
Start With a Plank and a Photo
The quickest path to a match, or to the right alternative, starts with a loose plank or a clear photo of your floor and its edge. Bring them to our Windsor or Cheyenne showroom, or request a free estimate and meet with one of our project specialists about the room you want to add or the floor you want to match.


